A little while ago a user reported problems with the Ground Polygon Wizard. When slicing the polygons, some polygons were missing. I have now debugged and fixed this issue. From tomorrow the improvements are available in the development release. So if you are using the Ground Polygon Wizard please update to this version, the previous version can deform or loose some of your polygons.
Bye bye MVP
Since 2006 I was lucky to get an email every April 1st telling me that I had been awarded a MVP award for that year. But this year I have not been so lucky, I got a message my award has not been continued. So thanks to Microsoft of the opportunity of being an MVP for those years.
Of course this won’t influence my FS activities at all. I will still continue doing what I enjoy doing, making tools for scenery designers, trying to find the limits of FS and running the FSDeveloper community.
RGB reader updated
I have made some updates to the RGB texture loader of ModelConverterX. The first one is a bug fix for textures that are not square and the second one is added support for RLE compression in the RGB textures. With this the most commonly used RGB textures should be read by ModelConverterX.
For those not familiar with RGB textures, this is a texture format designed by SGI that is usually used for OpenFlight models. So with this expansion of the RGB texture loader it should be even easier to convert your OpenFlight models to FSX or Prepar3D. The mass texture editor can now take care of the texture conversion from RGB to DDS.
Drawcall minimizer bugfix
I have just fixed some bug in ModelConverterX, to be more precise in the drawcall minimizer functionality. The bug was that when an object has LODs, the drawcall minimizer did not work correctly. This has been fixed now. This bugfix will be available in the development release from tomorrow.
Basic version OpenFlight reader available
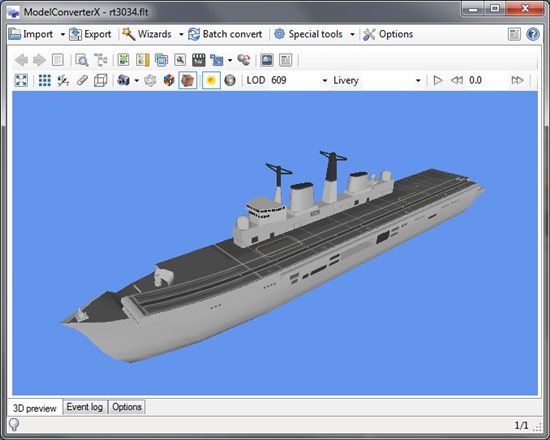
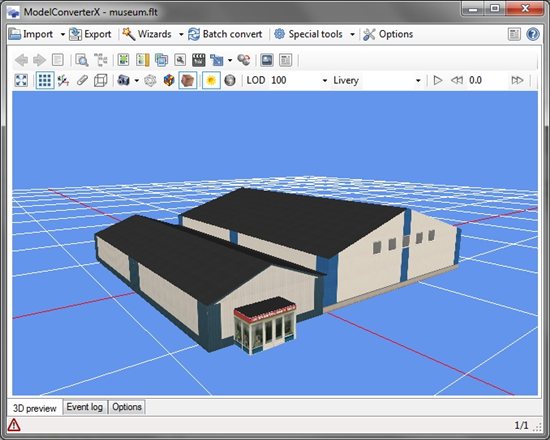
Yesterday I already wrote about the OpenFlight reader for ModelConverterX. Today I have been testing this new reader with some additional models and I have just added the functionality to the development release. So from tomorrow you can give it a try. Besides the models I exported from ModelConverterX itself, I also tried it with some sample models I found on the internet. As you can see in the picture below these also import now.
I called it a basic version because I know there are still some OpenFlight nodes that will not work correctly. The most important of these are the Switch and DOF nodes. Once I get some test models with these nodes in them I will update the functionality further.
OpenFlight reader
I have a list of feature requests for ModelConverterX, some items on this list have a higher priority than others. But as it goes with priorities they sometimes suddenly change a bit. For example I was planning to finish the Ground Polygon Wizard first, by adding support for seasonal textures. But some activities at work meant that the OpenFlight reader, which was almost at the bottom of the list, suddenly got more priority.
So this weekend I started to implement this new reader for ModelConverterX. At the moment I have the basics working, as you can see in the picture below. But this new reader is not yet available in the development release, that’s because I want to test it with more OpenFlight files first. At the moment it works best with OpenFlight files that ModelConverterX created itself. Obviously that is a nice start, but not enough for a functional reader.
So what could you do with this new reader once it is done? You could import OpenFlight files and convert them to FS MDL files. If you are transferring 3D models from another simulation system that uses OpenFlight that might be useful. This is probably mainly interesting for people who are using ESP or Prepar3D for professional purposes.
Hopefully tomorrow I can test this reader with some more objects and once it is robust enough I will make it available in the development release. I’ll keep you informed about the progress.
Creating ground polygons for FSX with SketchUp
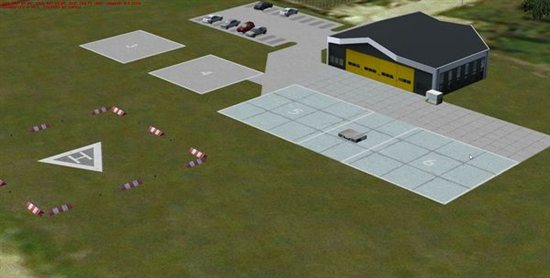
Over the last days I have been working on the Amsterdam Heliport for the NL2000 scenery. One of the tasks I did was to update the ground polygons of this scenery. Instead of using GMax for this, I decided to give SketchUp a try. In this blog post I will give an overview of my experiences.
Pros
- If you use the SketchUp feature to load a background image from Google Earth it is easier to position your ground polygons at the right location in the world.
- When you draw another polygon in SketchUp that is on top of an existing polygon, the new polygon is automatically cut out of the other one. So this means you need to use less layers in the end, since there are less polygons on top of each other. On the other hand, if you are using transparent textures and what two polygons in the end this can also be a negative feature.
- I still find it more fun to model in SketchUp than in GMax, it just seems easier.
Cons
- Mapping the textures is less convenient in SketchUp, especially since you can not alter the mapping of multiple polygons at the same time. So making sure the textures were mapped as I wanted took me more time than I wanted.
Conclusions
So if we balance the pros and cons, where do we end up? I am not sure yet if I prefer GMax or SketchUp for my ground polygons. At the moment I would say it is still 50 – 50. I guess I will have to do another test project to really find out. Maybe one with more markings and other features, to see how that works out.
Ground Polygon Wizard: shadow bug – a partial fix
In the next development release of ModelConverterX the ground polygon wizard as a new option: Prevent autogen suppresion. When you check this option the file will have the tweak to keep your autogen around the airport. However there is a bug in this tweak that it will result in flickering shadows. So if your shadows are important you better not select this option.
This is just a partial fix of the problem of course, I will continue searching for a few to have both the shadows and the autogen. But at least you have a choice now which feature is more important for your project.
Ground Polygon Wizard: shadow bug
Oops, I forgot to test the output of the ground polygon wizard in FSX with the shadow option for scenery buildings on. And you know what, there is still a bug in the output that does not display the shadow correctly. I will try to fix this issue soon, but for now you are warned.
Ground Polygon Wizard and non ground polygons
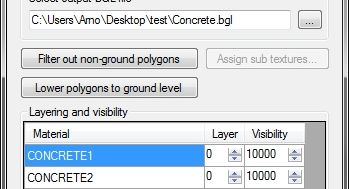 A user reported that the ground polygon wizard of ModelConverterX lost some of his polygons while converting them. When I was debugging this issue, I found out that this was because the polygons were not actually on the ground. They were a few centimeters above the ground. The code that makes sure the polygons are sliced correctly for FSX can’t handle such polygons correctly. That’s why some of them got lost.
So to fix such trouble I have made two small changes to the ground polygon wizard. The first is that you get a warning when your model contains such polygons. The second is that there is an additional button now, which when pressed will ensure that all ground polygons are lowered back to ground level.
Hopefully with these changes the ground polygon wizard works correctly in more cases. But let me know if you encounter more issues.
 SceneryDesign.org