CreateXMLLibObj changes

In the next development release of scenProc there is a change to the CreateXMLLibObj step, it has some extra attributes. This means that you will have to update your scripts to work in the latest version.

Before the step had the following attributes:

  1. filter
  2. guid
  3. heading attribute
  4. heading offset
  5. altitude
  6. optional options

In the new build the attributes are as follows:

  1. filter
  2. guid
  3. heading attribute
  4. heading offset
  5. altitude
  6. scale
  7. optional options
  8. optional guid attribute

The new attributes allow you to specify the scale of the object (either a value or an attribute name containing the scale value). The new optional attribute for the guid allows you to read the GUID from a feature attribute, instead of the value used in the guid attribute.

All the details are in the updated manual as well.

Material conversions

Lately I have been doing a lot of experimentation with converting objects between FS, AeroFly and X-Plane. Converting objects between the different simulators is possible, but of course there are differences. For example the way materials work is slightly different in each simulator. I have now added an extra material conversion feature to the material editor that can help you with this. When using this feature all materials in the objects will be translated between the selected simulators.

Below is an overview of what the conversion currently does. I’m sure it could be extended further in the future, just let me know if there are things missing.

FS to AeroFly

  • Convert normal map from FS specific form to generic form
  • Remove unsupported textures (fresnel, environment, etc)
  • Remove alpha channel from diffuse when used to blend environment map instead of for transparency.

FS to X-Plane

  • Convert normal map from FS specific form to generic form
  • Remove unsupported textures (fresnel, environment, etc)
  • Remove alpha channel from diffuse when used to blend environment map instead of for transparency.
  • Combine specular and normal texture into one sheet, as used by X-Plane

AeroFly to FS

  • Convert normal map from generic form to FS specific form

X-Plane to FS

  • Convert normal map from generic form to FS specific form
  • Split normal map into normal map and specular map

AeroFly FS2 support in ModelConverterX

I have added two new exporters in ModelConverterX, with these you can export objects to the TGI format for AeroFly or export scenery to the TSC format of AeroFly.

If you save your object in the TGI format, you need to use the AeroFly Content Converter to put it into the sim. ModelConverterX will save the basic geometry and material settings. Animations and levels of detail are not exported, since I haven’t learned how to do that.

If you export your scenery as a TSC file ModelConverterX will also export object placement data to AeroFly. All objects and the textures they used are all saved and the AeroFly Content Converter is automatically called for your scenery. All the object and texture files are put in the folder where you select to save the TSC file. The screenshot below shows some objects I placed with ModelConverterX.

The current implementation should work fine for scenery objects. For ground polygons I probably need to adjust some settings to let them work correctly. That’s something I plan to expand later. So please give the new exporters a try and let me know if there are issues or additional features that I could implement.

X-Plane DSF support

I have just released an update of ModelConverterX that adds initial DSF support for X-Plane. You can now read and write DSF files.

If you read an X-Plane DSF file the models referenced from it and the placement of those models will be imported.

If you write an X-Plane DSF file the file save dialog will ask you for the location the DSF file. You should go to the scenery folder of your choice and then press enter. The name you enter doesn’t matter. ModelConverterX will automatically make a folder objects to save the objects and a folder “Earth nav data” with the correct subfolders to store the DSF file.

Be aware that the DSF exporter does at the moment not merge what you save with existing DSF files. So if they already exist they will be overwritten!

If an object has multiple textures than the X-Plane OBJ and DSF exporters will make sure that multiple objects are exported and that these are all placed at the same location.

I’m sure there will be some bugs remaining, I’m still learning X-Plane as well, so let me know if you find something.

Remember form states

For scenProc I already implemented a function a while ago that it would remember the position and size of the different forms when using the application. For ModelConverterX such a feature was on the wishlist for quite a while already as well.

Today I finally implemented it and compared to the way I did it in scenProc a while ago I now made a very generic implementation, so that I can use it on any form in any application. So that way I hopefully don’t forget to enable it in the future when I add new forms to ModelConverterX.

If you grab the latest development release it will remember where you put all the different forms. So that means that you can nicely organize the main windows, the material editor and the other editors side by side. And next time ModelConverterX will have remembered your layout.

ModelDef viewer improvements

I have made two improvements to the ModelDef viewer in ModelConverterX lately.

The first one is that you can now search in the ModelDef file. At the top you find a toolbar with a text box for the search string and a previous and next button to search backwards or forward for the entered search string.

The second improvement is that you can now only show the part of the ModelDef file that is being used by your model. This is selected with the checkbox in the toolbar. If you select it (which is the default value now), only the animations and part info’s that are used in your model are shown. This will greatly reduce the list in many cases.

Which Visual C++ runtime files does XtoMDL use?

A problem often reported for ModelConverterX is that XtoMDL throws some kind of error when trying to compile. These are often the result of missing dependencies on the system of the end user. For example DirectX 9.0c not being installed. But XtoMDL (and its DLL files) also depend on the Visual C++ runtime files. Unfortunately which version you need differs between the different version of FSX and Prepar3D. In the table below I have tried to create some overview:

FS versionVisual C++ version
FSXVisual C++ 2005
P3D v1Visual C++ 2010
P3D v2Visual C++ 2010
P3D v3Visual C++ 2010
P3D v4Visual C++ 2013 and Visual C++ 2015
P3D v5Visual C++ 2013 and Visual C++ 2015
FSWVisual C++ 2010 and Visual C++ 2013

Dynamic lighting

I have finished a new feature for ModelConverterX, so just in time as a big Christmas present to all ModelConverterX users. Since my summer vacation in July I had an idea how I wanted to support the new dynamic lighting feature of Prepar3D v4 and now I have finally implemented it. This means that you can use ModelConverterX to preview the dynamic lighting and to generate the effect files that place the dynamic lights. You will find this new feature in the latest development release. I’ll explain how it works in this blog post.

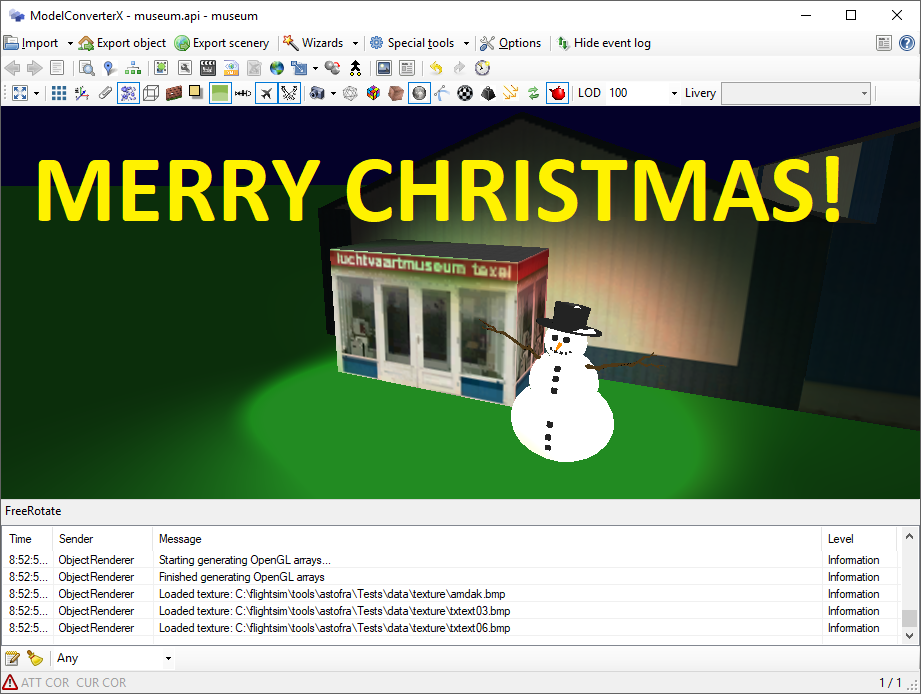
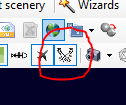
If you are loading an object that includes special effects with dynamic lighting, make sure you have the rendering of the spot lights enabled in ModelConverterX. That’s the button I encircled in red in the image on the right. If this button is off, ModelConverterX will not render the spot lights for you.

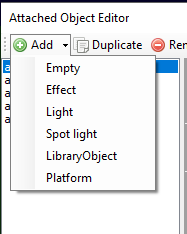
If you want to add a new spot light to your object, you can do this from the Attached Object Editor. In the Add drop down menu you will find a new object for Spot light. This will add a spot light object to your model. Using the Attached Object Editor you can now tweak and position the spot light.

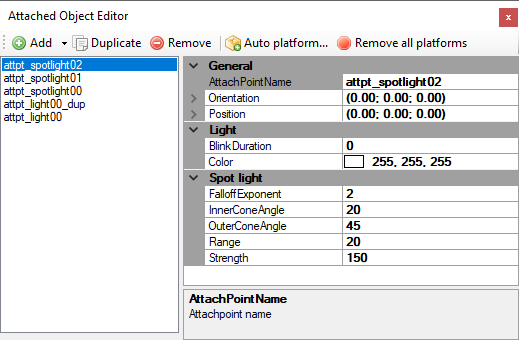
In the image below you see the different properties that you can set for a spot light. Setting the position and orientation works like any other attached object.

In the Light category you can specify the color of the spot light and if it should be blinking or not. In that case you need to enter a duration value for the blinking.

The Spot light category contains all settings that are unique for the spot light. This includes the inner and the outer cone, the range up to which the light is effective and the strength of the light. All these values have affect on the rendering in the preview. The special effect file is generated based on these values you enter.

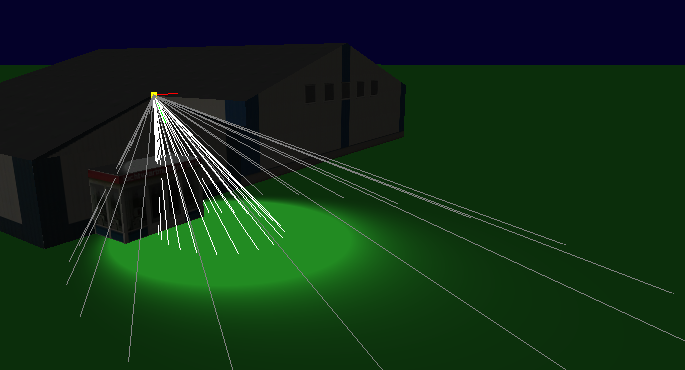
If you have the rendering of attached objects enabled in the ModelConverterX preview, you will see the cone rendered visually as shown in the picture below. The brighter cone is the inner cone and the more darker one is the outer cone. If you change the values in the properties the cone rendering will change. The length of the cone is linked to the range that is specified for the spot light.

There is one other new feature I would like to mention. In the importer options you will find a new setting called “Replace effects by lights”. By default this is set to false, but if you set it to true ModelConverterX will try to replace the (spot) light effects in your model with (spot) light objects. This means that you can tweak all the properties like when you are creating them new. With the default value ModelConverterX will just load and show the special effect files. But then it is harder to change how the light looks.

I hope you will enjoy this new feature!
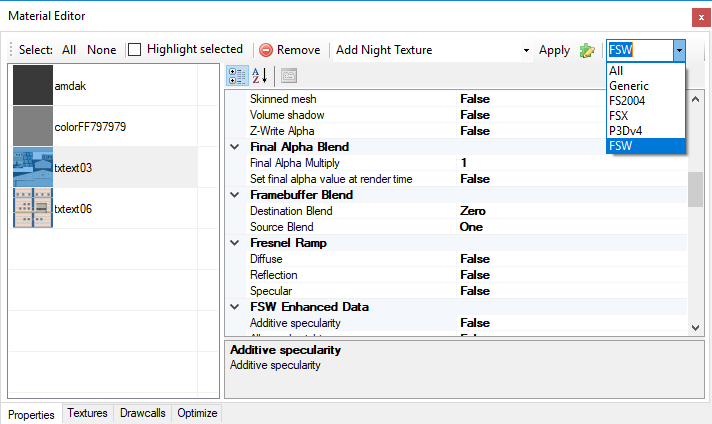
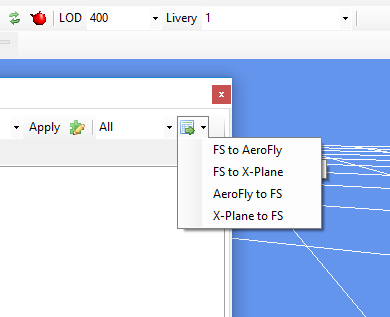
FSW MDL support & Material editor filtering

Last week Dovetail (finally) released a SDK for Flight Sim World (FSW). I have now updated ModelConverterX to support the FSW MDL format as well. This means you can read and write the FSW MDL files. To write them (or the FSW BGL files) you need to have the SDK installed.

I can’t garantuee that all new PBR material attributes are read correctly from the MDL file. I tried to locate most of them, but some I can’t find yet (when I change them in the X file, nothing changes in the MDL file). So let me know if there are specific issues.

With the new FSW material attributes the amount of attributes in the material editor has grown even more. So I have also added a filter to the material editor now, so that you can show the variables that are relevant for the FS version you are working with. For example if you select FS2004, you will only see those that are exported to FS2004.