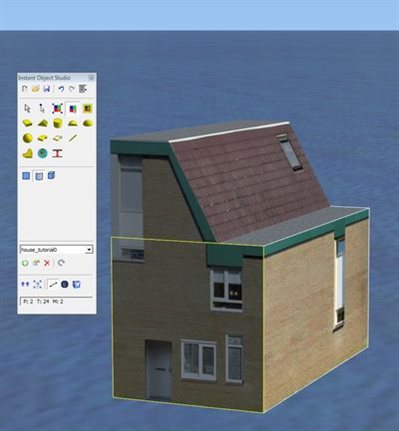
 Since my previous blog post about the new Instant Object Studio tool I received a review copy of the tool (thanks for that Konstantin). So I am now able to answer some of the questions I still raised in my previous post.
When placing for example a roof on a box, the tool does not remove the top polygon of the box, altough it is not visible. So that means there are slightly more polygons than optimal, but for most objects that should not matter too much for the performance. Especially if you make sure it has the same material as other polygons in the model, in that case it ends up in the same drawcall.
Speaking about drawcalls, as long as you are careful about how many materials you use when modelling, the generated scenery objects can be very light on drawcalls. As an example I tried to model the house I did for my SketchUp tutorial again with this tool. This house only uses one texture sheet, so the generated model has only one drawcall.
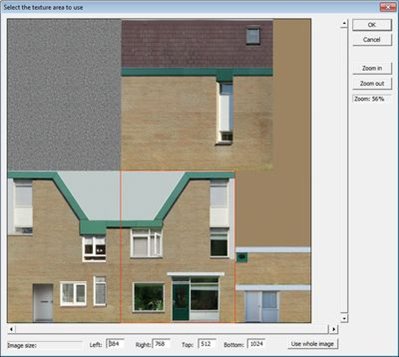
I also mentioned in my previous post that I did not like the visually dragging and scaling of the textures, as that makes it hard to align exactly the part of the texture sheet you want. Especially when you put all your texture parts in one big sheet that can be tricky. But there is a function in Instant Object Studio to help you with that already.
In the material settings you can select that the texture should be stretched along the X and Y axes. With the Area button you can then choose the area of the texture you want. If you then apply it to a polygon, exactly that piece of the texture will be fitted on the entire polygon. Works quite neat I would say. It’s not as flexible as the UVW Unwrap editor in GMax, but I feel it gives me better control over where the texture goes than in SketchUp. Maybe starting scenery developers won’t appreciate this feature so much, but if you try to model with one texture sheet only I feel it comes in handy.
I’ll continue to test this tool more, as it seems to be packed with interesting features. Make sure to read the manual to learn about all the shortcuts and restrictions that can be applied. Next thing I will probably test is see how easy it is to make a building when you have a photo scenery showing that building. The object I made now is in the middle of the sea. But I think this tool can be really handy to trace buildings from photo scenery. I’ll share my experiences again after I have tested this.
 SceneryDesign.org
Arno,
I’m curious if you’re finding things satisfactory with I.O.S. a few months in.
I’m considering the purchase in order to “annotate” some photoscenery I have with basic rectangular industrial/office buildings using the native FSX textures.
I’ve yet to try the demo, but I’m interested to learn if you’re still using the tool and finding it very useful!
Thanks for your insights here on the blog…
-Greg
Hi Greg,
I must say I haven’t used it much since then. That doesn’t say I don’t like it, I haven’t used other modelling tools a lot either :). I just spend most time building my own tools and less time building scenery.
Hi Arno;
I have just purchased IOS and being an absolute, overly ambitious, newby to scenery design in FSX, it does seem to be a fairly straight forward tool that serves my purpose of creating objects, buildings, over aircraft. I do not have a lot of time to play with this during the week but, over the weekends.
I was most familiar with FS9 and have found a steep learning curve dealing with FSX and this seems to be very helpful. I am very interested in your opinion on this tool.
Thank you